Pages

Friday, 1 November 2019

A Mixed Media Maple Leaf Make

Hello and Welcome to my post for


This month I moved away from my usual
floral type makes and went for
a pretty maple leaf and some cogs.
Something a little less time consuming
after last months piece.
It's a 4x4 canvas sealed with gesso.
and textured with stenciling
from Little Birdie

Adding colours with Lindy's Shakers in
Magnolia Magenta Gold
Grab a Guy Gold and
Cowabunga Copper
and more stenciling with some script using
Cadence Relief Paste .
Coloured up my chipboard cogs and attached to canvas.
Also attaching my maple leaf which is from a
very old Cuttlebug Die and cut multiple times
coloured using Jolly Roger Red Alpine Rose
and Glory of the Sea Gold Sprays
Metal cogs are heat embossed with
Wow Chocolate Caramel Pearl Powder.
Added lots of waxing in
Art Alchemy Fire Ruby Royal Robes
and Rich Copper
around the canvas edges and cogs.
Coloured a few cabachons to finish.

A few close ups - 


That's it for this month.
 Pop over and see what my Talented Team Mates created.
Hope to see you in our Gallery.

Once more I will join in the Challenge over at
Bleeding Art for their Anything Goes Here


Born to be Wild

Hello November and Welcome to
Happy Little Stampers
Time for our Watercolour Challenge


and our Optional Twist is


When I saw this option I knew exactly what stamp set
I was going to use. It's
Happy Little Stampers Born to be Wild
My background is made from
Magical's Sprays (of course)
and the surround circle die of the lion
is also with Lindy's Sprays/Shakers.
I stamped my lion with VersaFine Clair in
Fallen Leaves then heat embossed in clear.
I like the effect I got with the different outline shades.
I cut out a Kaisercraft die that I thought
could look like part of a cage. Again I used
Magical's and used my fingers to cover it.
(I still have coloured fingers a day later)
Needing something more I cut several leaves from
Carta Bella Spring Greenery arranging them
around the lion and 'cage'.
Lucky I have some Glad Press and Seal
that helped me hold all of this in one piece
so I could glue them all down.

I really had a lot of fun getting inky here.
Hop on over and see how my Team Mates
chosen to play this month and
come join us in our Gallery.
 Hope to see you there.

This lion is roaring over to join in the Silhouettes
at Double D Challenge


UPDATE!
Just saw that over at
Mix It Up Challenge their
Anything Goes Current Challenge
optional twist is Watercolouring!
My card above fits perfectly.


Saturday, 26 October 2019

Thankful...

Hello and welcome to my Saturday post for


Here's my take on our Photo Challenge below
chosen by our Host Bobby.


There are always gorgeous photos of sunflowers
and pumpkins and this one is a 'beauty'
My stash is light on with pumpkins but lucky for me
I have a few good ones - and the one I used is the
STAMPlorations Oh-So-Grateful-Stamps-and-Coordinating-Die
I heat embossed my pumpkin with Ranger Potting Soil
then coloured with a variety of Lindy's Magicals.
Also added a bit of Art Alchemy Wax.
This was then die cut.
My background stencil is a new one called
Barley-ARTplorations-Stencil-Sanna-Lippert-Designs
and sponged with those amazing blending brushes.
The Thankful is heat embossed and from
Thankful-Blessed-Dees-Artsy-Impressions
My pumpkin was popped.
Added a brown backing and adhered to
my white card base.
ohsogratefulstampsdiepreview-ThankfulandBlessedpreview-barley
Pop over and see what out Super Guest Chris
Simply fabulous having her back with us this month.
and the Team have created and come join us.
You could be our Chic of the Week
and a future Guest like Chris.

Sending my card over to Addicted to Stamps for their
Challenge #178 to add a Pumpkin and
Dies R Us Challenge  using the Theme of
Pumpkins and/or Apples

Image result for Fall Harvest

Thanks for dropping in


Wednesday, 23 October 2019

Mixed Media Magical's Make

Hello and Welcome. Today's post is to show you
my finished Mixed Media project I played with recently.


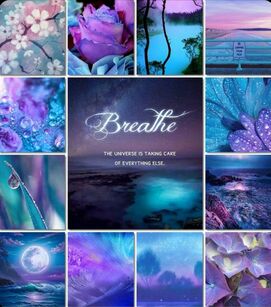
Over at Random Arts they have this divine Mood Board

Picture

and being a 'purple person' had to use this as my inspiration.
I am building my supply of Lindy's Sprays and 
I got them out to use some for the first time
to experiment. As I had nothing special in mind
besides using the colours of the mood board
I just went with what came to mind.
I gesso'd my 5x7 canvas and started building layers with
Dry Wall Tape, Punchinella, Little Birdie Stenciling 
using Dreamweaver Crackle Paste
 and a few things from my stash.
Then the fun began with the colours.
Adhered some cheesecloth to the back of my
Little Birdie Flowers that I have waxed  for effect.
Some Art Stones and Distress glitter made for more layers.
Randomly added some stamping from Art Alchemy
and finished with a few cabachons and some white splatters.

I am linking this up to the current challenges at
using from the store Here
Lindy's Sprays
Dreamweaver Crackle Paste Distress Paste
Distress Glitter Art Stones
Little Birdie Flowers and Stencil
Art Alchemy Waxes
and Bleeding Art for their

Thanks for dropping in.
Love reading your thoughts.


Tuesday, 22 October 2019

Spotlighting my Thistle Silhouette

Hello and Welcome.
Today I am showcasing a favourite Stamp
using a Silhouette image for Double D Challenges
and what else would it be for me but 
The Flower of my Homeland - A Thistle.


Something a little different from me here.
I had not planned to highlight my thistle
but the dark background just didn't show
the flower properly so thought I would
ink it up in white and colour it in it's true colours.
The background is a combination of 
various distress inks swiped from side to side
onto photo paper and then heat embossing 
my Lavinia Thistle in black.
I inked the edges with black archival ink
and  randomly swiping also from side to side.
Added some Art Alchemy in Rich Copper
and Stampendous Aged Copper embossing enamel
to ground my flower.
Die cut sentiment twice - black on white
and is from CUTplorations.
Popped my die cut thistle, sponging with a light lavender
to soften the whiteness,
 added a white mat and adhered to black card stock. 
This really was a fun card to make. 
Thanks for a great challenge DD.


Monday, 21 October 2019

Your 'Special'

It's the start of a new week and I have been busy
making another card for the October Challenge at
using Patterned Paper with our stencil.


I did have another one made but decided to
make the card above as well.
Lots of white space here and highlighting 
my stencil on a pretty peachy coloured 
patterned paper. 
I used Cadence Champagne Paste
on my stencil and framed it with a 
Spellbinder die and popped.
Adhered the same paper for added colour
and onto white card base. 
Sentiment is from STAMPlorations
and die cut ARTplorations 

Thanks for dropping by 
Till next time Cherrio from


Saturday, 19 October 2019

It's a 'Twofer' for Just Us Girls

It's Saturday and posting day for
Just Us Girls and this week Host is Sue
choosing 


This is the second card I made for this challenge
as I wasn't sure if the first one I had gone too far
on the background.
The outline image from Rubbernecker
called Bouquet was on my work bench
so thought I would play around with it
using the three colours with Tim's Distress Inks
and some Magical's for a bit of shimmer.
Sentiment die is from Crafts4U.
Added some splatters and backed it with
matching card stock.

And my first card

The bright coloured  background was smooched with Magical's
and added some grunge in black for contrast.
Feather is from STAMPlorations Trendy Feathers 2
heat embossed as is my sentiment from
STAMPlorations Bold Sentiments.
Die cut and attached to purple paper and
adhered to black card base.

Pop over and see what our Guest Chris
and the Team created and join us in our Gallery.

Thanks for dropping by.


Thursday, 17 October 2019

A Retro Happy Birthday

Hello and Welcome
A quick post today for the current challenge at
Retro Rubber where you ink up stamps 
that are more than 12 months old.
I enjoyed making one for their Tic Tac Toe Challenge
a few days ago and so made another  - 
this time with a bit more stamping on it.


I chose to go down the right had side  with
Floral Ribbon and Birthday.
RRCB 121

My stamps that are older than twelve months are
SU Just Believe (2012?)
for the background leaves
and Curly Cute (2012) for the sentiment.
The leaves were inked with
 SU Mossy Meadow and sponged.
The Happy Birthday in the same colour.
Added a few die cuts wild flowers from Tim Holtz
waxing one with Art Alchemy Heather Hills
and the yellow brushed with Nuvo Shimmer.
I added SU ribbon and adhered to
Mossy Meadow DP and white card stock
embossed with Cuttlebug Swiss Dots.
Attached then to my white card base.

Thanks for dropping in
Love reading your thoughts!


Tuesday, 15 October 2019

It's REMINDER Time at STAMPlorations

My post today is for our Reminder that you still have time
to enter our October Challenges over at STAMPlorations

I went all bright and pretty for my Reminder Card using
A-Bloom-and-Three-Buds as my feature stencil and
Evolution -Sanna-Lippert-Designs randomly in the background
preview-web-stencil-a-bloom-and-three-budspreview-evolution
using Tim's Oxide  Inks in
Picked Raspberry  Wilted Violet
Peacock Feathers and  Seedless Preserves.
I then added some grunge from
SheryRuss_Scribbly Splattery Grunge-previewSheryRuss_MixedMediaElements
I used Rusty Patina Paste to cover my 
floral stencil and added a touch of wax
to the centres of the flowers.
FloralBliss-preview
Added a black mat and onto
metallic card base.

Pop over and check out what the 
rest of the Team created and come join us.

If you play, make sure you include the graphic below 
in your post and link back to this THIS post 
in order to qualify for our prizes

Thanks for dropping in. Love to read your thoughts.
Till next time -


A 'Pinky' Birthday Card

I'm Tic Tac Toe'ing today for
Hello and Welcome.

As you can see I went from top left
to the middle and bottom right.

RRCB 121

I used one of my favourite old embossing folders
from SU called Manhatten Flower with the
Funky Flower from Craft Concepts.
Both were embossed with Pink Bazzill paper.
I wanted a touch of colour on my flower and used
Art Alchemy Royal Robes wax.
Here's a close up trying to show you
the shimmer - oh and my card still smells
divine from that wax.
After I cut the top part of the flower
I attached it to the embossed background
deciding not to pop it.
Added a coloured cabachon
and popped my die cut, gold, heat embossed
 Gina K sentiment from the 2010 Fancifold Tags stamp set.

It's always nice to get those older, sometimes neglected
stamps/embossing folders out and give them a little love.
Hope you like my make for today.
Love to read what you thought.
Till next time
ps. it isn't very long


Sunday, 13 October 2019

An Orange 'Twofer' for Double D

Hi and Welcome.
I had a bit of fun today inking up 
my floral Enchinacea stamp from Imagination Crafts
using 2 different papers. As you will see
'What a Difference' it made.
I am entering the second one in the current


Isn't it a gorgeous Mood Board?

They were pretty simple to make.
My first card I used VeraFine Clair Summertime
on basic white card stock
backing it with a retired SU Designer Paper
and attached to white card base.
I found the VersaFine Clair ink pad
perfect for getting coverage on this stamp.
Added a simple Happy Birthday sentiment
and that one's complete.


This one is much more interesting with the
Acrylic Painting Paper
 I bought from our local Aldi Store.
Love the textured outcome here with the same ink as the first.
I added a white backing and then popped onto white card base.
Sentiment is heat embossed on vellum with
Lindy's Pumpkin Fiesta.
Finished with some Nuvo Drops.

This card is also heading over to
Day of the Month Card Club
for their Challenge #8 encouraging us to
Make and Send a hand made card because
You are Important to Me.
I thought the sentiment on this card was perfect
for that very reason.

Thanks for stopping by. I would love to know
 your thoughts on which one you prefer.