Pages

Saturday, 13 June 2020

What's the Trend Challenge at Just Us Girls?

Hello and Welcome to today's post.
It's my turn to Host this week's Trend Challenge at
Just Us Girls


I decided to go full on with my frame by using
a peek a boo die cut.
I had this lovely shimmery piece of paper (Lindy's of course)
 in my Bit Box and as it was only a small piece
I had enough to cut out a simple flower die to match
the background of my frame.
This was then popped after inking my sentiment
which photographed a blueish colour,
finished with a few gems to match.

Pop over and see what our Guest Mugdha
and the Girls framed and come join us
in the Gallery. You could be our Chic of the Week.
 Thanks for dropping in.


Saturday, 6 June 2020

You are my 'SUNSHINE'

Hello and Welcome to today's post for
Just Us Girls
This weeks host is Maria choosing a word that
should bring a smile everyone's face.
As it is a new month we have a New Guest Designer.
Welcome Mugdha from  craftomania123.blogspot.com/

We all love to get out in the sunshine especially
at the moment with restrictions abounding.
Maybe you could go in a different way by
showing someone how they bring sunshine into your life
like I did here.

Tim Holtz Rays Stencil did all the work here.
I simply inked with VersaFine Clair
Cheerful and Summertime then sprayed a little with
 Lindy's Glory of the Sea Gold Spray for shimmer.
Cut out my Sentiment Die from CUTplorations several times
and swiped with the inks above getting a variegated look.
Added some diamond dust to the centre of the O.
Attached to a small white frame and on to yellow card base.
Simple but striking!
Thanks for dropping in.
Don't forget to check out what our Guest Mugdha
and the Team created and add yours make
to our Gallery.

Friday, 5 June 2020

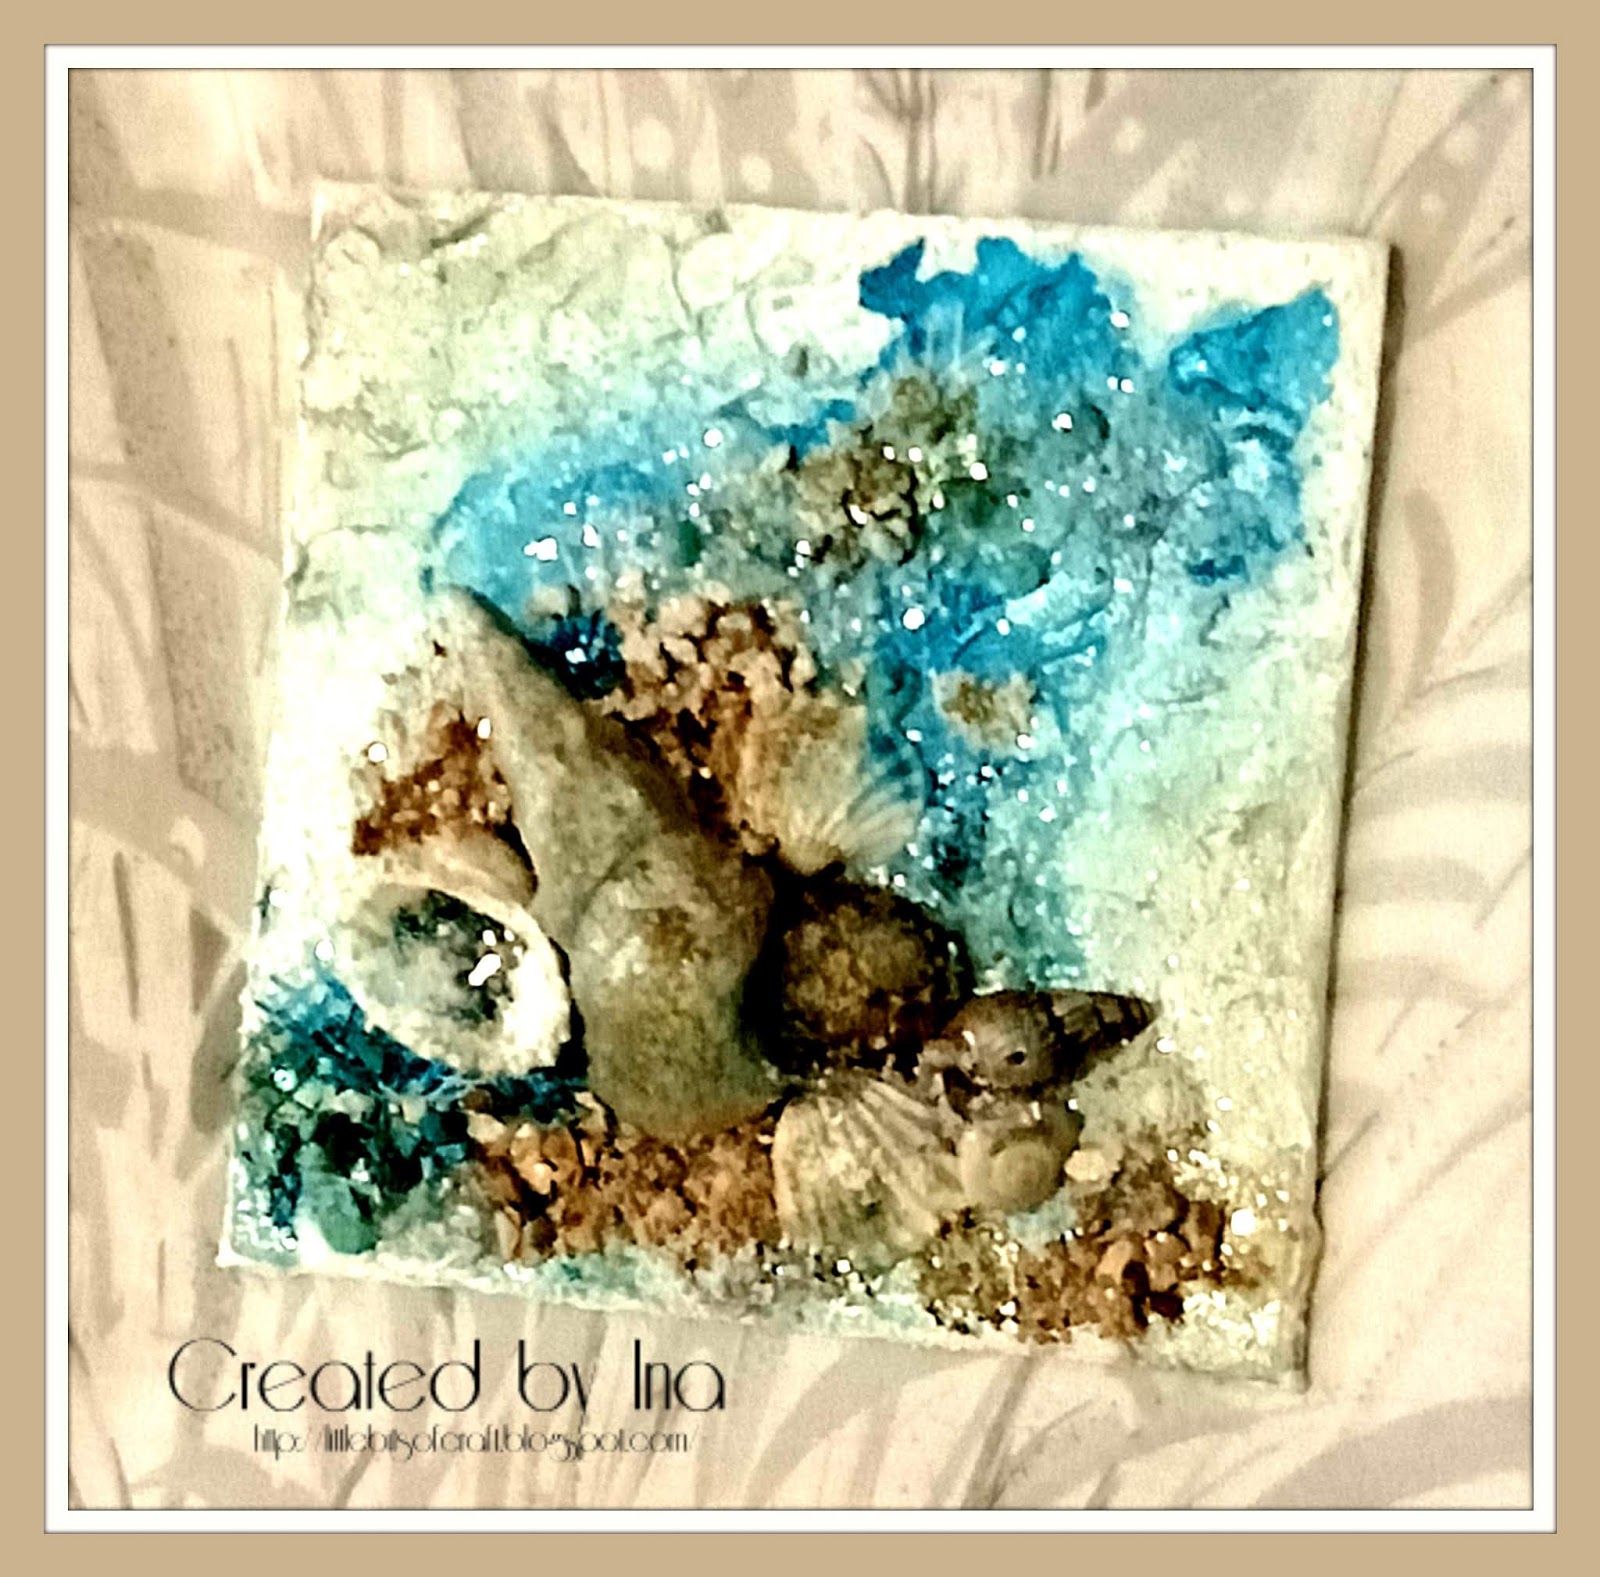
Sea Shells by the Sea Shore

Hello and Welcome.
Today's post is for the new Anything Goes Challenge
(using multiple mediums) 


This time round I decided to visit the seaside since
winter is fast approaching - trying to hang on to 
the warm and delights of the sea.
Started off with gesso then texture paste for dimension.
Sprayed with Lindy's Magical's, adding some
plaster's tape and on to my sea shell arrangement.
Added lots of bits and bobs -
Art Alchemy Art Stones and Waxes,
Glitter, Derivan Mica Flakes and Bauxite,
Tiny beads and Nuvo Stone Drops.


Pop over and see what the rest of the 
Talented Team created for your pleasure this month
and hope to see you in our Gallery.
Thanks for dropping in
Till next time - Cherrio from


Wednesday, 3 June 2020

'Hello' there

Most people that know me will be aware of
how much I love adding texture to my makes and 
this is what I have done here with one of my 
newest favourite stencils from Tim Holtz.
Hello and Welcome to Addicted to Stamps and More
for their make Your Mark Challenge.


My stencil mark has been applied with texture paste.
The leaf in from Gina K inked with 
SU Mossy Meadow. Sentiment is Altenew.
Corner is punched  and inked also with the Mossy Meadow.
Added a white punched flower and a pearl to the centre.
the pearl spray in the background is from my stash.
Attached to white card base.
Pop over and see what the rest of the Team created
and hope to see your mark in our Gallery.
Thanks for dropping in.

Monday, 1 June 2020

Acrylic Block Stamping for Mix It Up

Hello and Welcome to today's post for
This month we are looking for some
Acrylic Block Stamping with our
Anything Goes Challenge.
Before I go any further if you are a regular visitor 
I must explain why you are seeing this card
when only a few days ago you saw the same stamps
 and with similar colours!
This one was made for the above challenge,
blogged and scheduled quite some time ago.
***
Once more I have played with one of my
favourite stamp sets Creative Chaos
from Visible Image.
Don't you just love that grungy black frame?
My good friend Aussie aNNie created it for me
making my card look extra nice. Thanks Annie.
I did my stamping a little different by
inking my SU colours of 
Calypso Coral, Mossy Meadow and Hello Honey
onto the edge of  my acrylic block and swiping
in different directions. Also added some extra swiping 
just by inking the fine edge like you would with a credit card.
I then inked my main flower and
around the edges with stamps from the set above. 
Using some of the shaving cream leftovers I 
coloured my paper for the cut flower head and then again
 with a smaller cut and popped both.
Sentiment is from STAMPlorations.
Attached to SU Groovy Guava card stock.

Hope you like my make and pop over
to see what my Team Mates created then
come join in the Gallery this month.
Thanks for dropping in.


Stencil Time at STAMPlorations

Hello and Welcome. As it is the first of the Month
it's time for my post for the


For this challenge I decided to  head back and use
a few of the older stencils and the main focus is on one of my favourites
 ARTplorations Flowers 1 Stencil.
I started my background smooching with
 Autumn Maple Crimson Magical's
then added Texture Paste through the 
and while wet sprinkled some Martha Stewart glitter.
(You may need to click on it to get a better view)
On to my topping. I used the
randomly then the flowers with texture paste.
After that was dry I put the flower stencil back and
sponged a mix of the above Magical's
and Lindy's Bougainvillea Fuchsia.
To highlight the flowers I added Art Alchemy Indian Pink Wax.
Distressed the edges and added a small popped frame.
Sentiment is from 
Finished by adding to white card base.

Here are the products I used
preview-flowers1preview-web-stencil-077-DotsAllOverpreview-stencil119-PlaidMakerpreview-SheryRussBloomHappy

Hope you like my colourful make.
Check out all the art work from all the Designers
and would love to see your stenciled creation
in our Gallery this month.
#Reminder
When playing in our challenges, you must display the challenge graphic 
AND link back directly to the challenge post 
(NOT to the main blog or the challenge section) 
via TEXT link in your blog post in order to qualify for the prizes. 

I will have a reminder for you in the middle of the month
just in case you get sidetracked.
Also there is a 20% discount if you use my code
STAMPGIRLINA to purchase goodies.
Thanks for popping in

Time to 'Layer' it Up at Happy Little Stampers

Can you believe we are half way into the year!
I know I can't. 
Our Challenge over at Happy Little Stampers
starts with our Watercolour Challenge.
This month our Anything Goes Option is Layers


Every now and then it is nice to go back to a technique
or something in your stash that is a favourite.
This is what I did here. I got out two that go so well together - 
SU Manhattan Flower EF and Fifth Avenue Floral Stamp Set.
Heat embossed the flowers in white then watercoloured  with
Nuvo Powders and fussy cut, popping up the smaller one .
This was attached to hand cut Manhattan Flower.
To add more layers I added more dry embossing with
Kaisercraft Leaves with paper to blend with the flower.
Corner rounded for effect. 
To finish my card I added Diamond Dust to the
 embossed background and front flower
instead of adding a sentiment.
Finished by adhering to my white card base.

Pop over and see what my Team Mates chose to inspire you
and join us in our Gallery this month.


Saturday, 30 May 2020

It's 'Wild Card Week' at Just Us Girls

Hello and Welcome to my Saturday post for
Since we have 5 Saturday's this month it's time to
Play the 'Wild Card' and choosing how is
Our Host Sue!


and we ALL have a plentiful supply in our stashes don't we?
No excuses for not getting just a smidgen out to play with us this week.
I was happily crafting along with my favourite
Visible Image Creative Chaos stamp set
when I realized that one I had made
moons ago for another challenge goes live in a few days
so if you pop back then
you will see a double take on this great stamp set.
***
The gorgeous grungy papers I used here are from Paper Rose.
I inked up the flowers on one of the papers
and fussy cut the heads in another, adding stamping
here and there for interest. Coloured a few circles with
a white gel pen and stenciled some splatters.
Glitter was sprinkled on to the main floral centre.
Sponged TH black soot around the edges before
adhering to white card base.
A simple stamped sentiment finished it off
Thanks Annie for again adding a cool grungy frame to my photo.

Pop over and see what Deborah and the Team
created using different patterned papers.
Come join us in the Gallery!


Monday, 25 May 2020

Steampunk in September

Are you a Steampunk Enthusiast and looking for
somewhere to showcase your creativity?
Look no more. There's a New Exciting Steampunk Blog 
in the making and come September it's all Go!

cover photo, No photo description available.
Check out the Steampunk Challenge which includes a bit of
grunge and industrial bits thrown in. Join up
so you will be ready and itching to get started
and add a Note to your Diary.
First one starts on the 1st September and runs for the month
so check back often for more details a little bit down the track.
***

cover photo, No photo description available.
PS In the meantime if you are itching to see some
amazingly talented Steampunkers showing their style
 there is a Blog Hop going live on the 19th June.
There are 14 sponsored prizes for commenting.
More details on that coming soon also.


Saturday, 23 May 2020

Photo Week at Just Us Girls

Hello and Welcome to my Saturday post for
Bobby is Hosting and picked an awesomely colourful one.


Here's a close up!

As soon as I saw this I KNEW what stencil
I was going to use. 
preview-evolution
and isn't it just perfect!
My inspiration came from those chair covers.
Bobby was thinking the same as she has used the
same stencil on her card. How cool is that!
I kept it really simple. I love how when you 
use oxide inks on photo paper and after your inking dries
you wipe it over with a paper towel and the colours 'explode'
I did that multiple times shifting the stencil
to get lots of colourful layers.
I used Tim's Distress Glaze to seal
adding the die cut Hello from Pink Fresh Studio.
Attached to bright orange card stock to finish.
Pop over and see what our Guest Deborah
and my Team Mates created.

Hope to see your take on this fab photo in our Gallery.
Thanks for popping in

Wednesday, 20 May 2020

What lies 'Under the Sea'

We have the most beautiful photo at
Addicted to Stamps and More for this weeks Challenge.


I couldn't go past the sea shell covered in pearls.
As you can see that is where my inspiration came from.


Lots of smooching for my background,
stamping some fish netting, adding grit texture paste,
ink splatting, fussing cutting my coloured sea shells
 and popping them. Added lots of glitter, pearls
and gems. Finished with an appropriate sentiment.

Pop over and see how the Team were inspired
and come add yours to the Gallery.
Thanks for popping in.


Tuesday, 19 May 2020

It's Stencil Overload 2

Welcome back! Here is my second overloaded stencil card
for this month's CAS Stencil Challenge


I multi layered
ARTplorations Square Lots   Broken Glass   Bubble-Dance  
again with Tim's Oxide Inks then
Gel Medium to Just Flow and sprinkled with glitter.
Cut with a Spellbinder Die and framed.
Sentiment is an Impression Obsession Die cut.

Thanks for popping back in again.


It's Stencil Overload

I had a fun afternoon playing with my stencils for the
current CAS Stencil Challenge where we are
required to layer them.
Hello and Welcome!
I made two cards using some of the same stencils 
with totally different layouts. The first one is below.


I inked several of Tim's Oxide Inks through
ARTploration Sencils Weaving  Just Flow
Square Lots and Texture Paste for dimension with Barley.
 Cut on an angle and distressed the edges.
Sentiment is from STAMPlorations Bloom Happy.
Attached to white card base.
It was such fun playing with all my stencils,
some got inked for the first time too.
Why not give it a go. There are several videos
to check out if you need a helping hand.

Thanks for dropping in today.
My second overloaded stencil card
will be posted a bit later.


Sunday, 17 May 2020

My CAS Mix Up Resist Make

Hello and Welcome.
It's always fun to try new techniques and this month at
CAS Mix Up we are asked to try our hand at Gesso Resist.
This is something I haven't done with gesso.


 I chose to create my card with the technique that Susan used
from a You Tube Tutorial by Kim Schofield Here.
 I made several attempts and a few didn't make it
but after inking this one above maybe those throw away ones
may not have been so bad after all.

I blended Tim's Oxide inks and once dry
added some water splatters.
Continued on by randomly stamping Prima Marketing Fire Fly
 with some circles from the top of a water brush.
My main image is from Inspired by Stamping
which is unfortunately no longer in business.
I have had this set for quite a few years and this is
it's first inking. Shame on me!
I wanted to brighten the colours so
brushed on a coat of gloss gel medium.
I was undecided what colour to use as my base.
I had a black frame on white base then vice versa
but liked neither and came up with just a touch of black
and scoring around the white card base.
My sentiment is a sticker from Tim Holtz.
Thought it fitted nicely with the stamped  image.
That's my card done.
My Mix is - Gesso Resist, Gel Medium, Stamping,
Inking, Scoring, Stickers
I am popping this over to the
NBUS Challenge #14 where we play with
Never before Used Schtuff
(mine is the stamped image)


Thanks for dropping in today.
Really appreciate your kind comments.